Subscribe to the Lowrey Little Blog for Email updates whenever I add a Post
Friday, September 30, 2011
Color Explosion!
You know you want to try this too!
Materials Needed:
Wide Mouthed Jar (we used a pickle jar)
Oil
water
food coloring
tooth pick or skewer
Directions:
1. Fill the jar with water around 1/2 to 3/4 of the way
2. Pour a thin layer of oil on top about a 1/2 inch thick
3. Take food coloring and squeeze a few little droplets on top of the oil
4. Take your toothpick or skewer and push the food coloring through the oil as soon as it breaks through the oil layer it will explode into the water
5. Make sure you use standard food coloring (it is water soluble) you do not want to use a fat based dye (cake dyes) they will dissolve in the oil which defeats the purpose of this fun experiment.
t
Thursday, September 29, 2011
Super Hero Day
Kaia made a Super Hero cape! We set out a blue tarp and made clouds so she could fly through the sky.
Wednesday, September 28, 2011
Crayon Melt
This was our first attempt
Well I loved the first one so much I decided to go a bit further and do the kids names. I used standard painters tape. I did not measure or anything I just eye balled it. I was not going for perfection
You can see it turned out awesome!
Mikey's was pretty cool too
What I learned:
1. Direct the heat to the center of the crayon.
2. New crayons seemed to melt much faster then my old crayons...not sure why something to think about though.
3. If you are doing a name, shape etc. with tape press down firmly so that the crayon doesn't get under the tape.
4. If you are doing letters you will need to make sure the crayon goes around the letters completely before getting the cool build up. The crayon for some reason was not getting to all the edges of the letters no matter how hard we tried to direct it. So to help it along I took an extra crayon in one hand and the hair dryer in the the other hand and melted the crayon around the letters to create an outline once the outline was there the dripping crayons up top started going in the right direction.
Monday, September 26, 2011
Apple Picking for Rosh Hashanah
We went to Oak Glen to go apple picking for Rosh Hashanah. We went with a Jewish Family group
The kids found this cute old play house to play in
We went there for the apple picking but there were tons of blackberry bushes so Mikey picked a lot of blackberries
The kids had fun looking through all the bushes although they were very prickly bushes
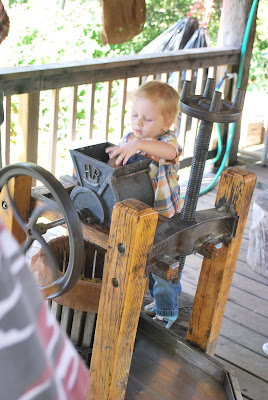
Kaia getting ready to put her apple in the press to make apple cider
We also made rope out of cactus twine
The kids got to keep the rope
We went on a hay ride too.
We made lots of Apple Cider we took a gallon of it home!
Mikey at the cider press
Everyone collected apples to make the cider
We then washed all the apples
After washing the apples
The kids each got to take some up to the apple press where the apples were crushed and the juices ran out into a bucket
Below is part of our group
The cider press area
It was beautiful and so much fun. We also got to go next door to the neighboring farm where they have a honey farm so we got apples and honey for Rosh Hashanah it was an amazing day with some great friends.
Friday, September 23, 2011
Mikey Catches a Lizard
Mikey caught a real live baby lizard.
Not only was he incredibly gentle he was fascinated and not at all scared
We released the baby lizard back into the wild(our backyard) so it could find its family =)
Not only was he incredibly gentle he was fascinated and not at all scared
We released the baby lizard back into the wild(our backyard) so it could find its family =)
Subscribe to:
Posts (Atom)